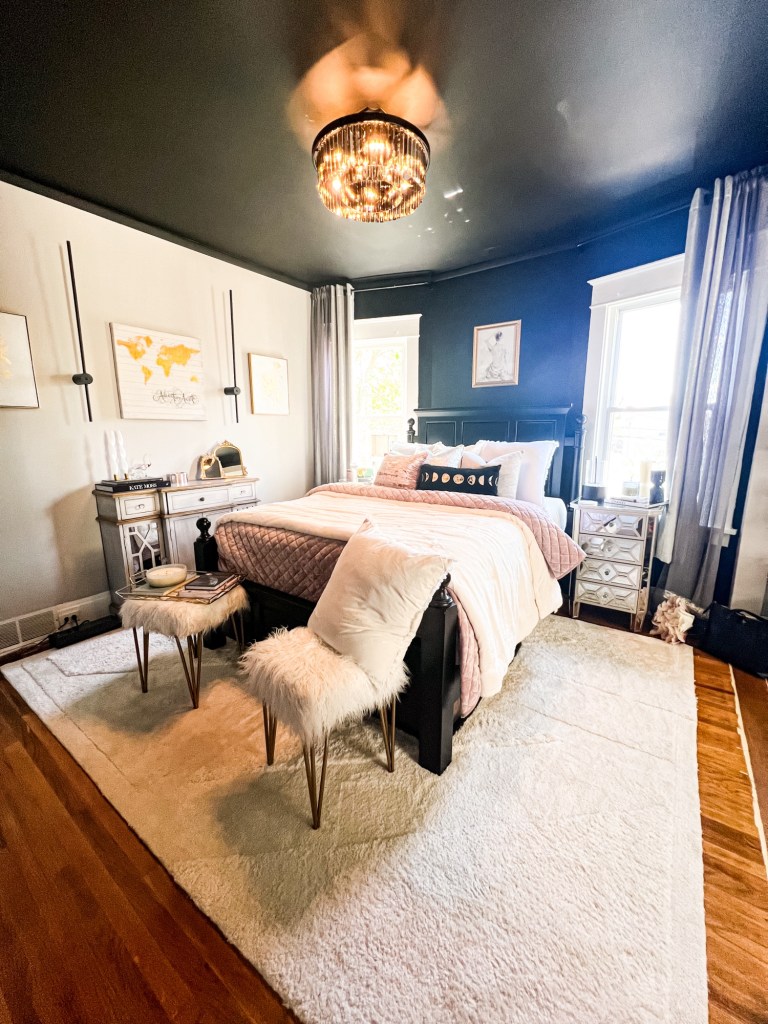
✨🖤 Taking the Out-dated and turning it into Moody Glam 🖤✨
This makeover started a few years ago when I first purchased my home but took a pause because… well, life happens.
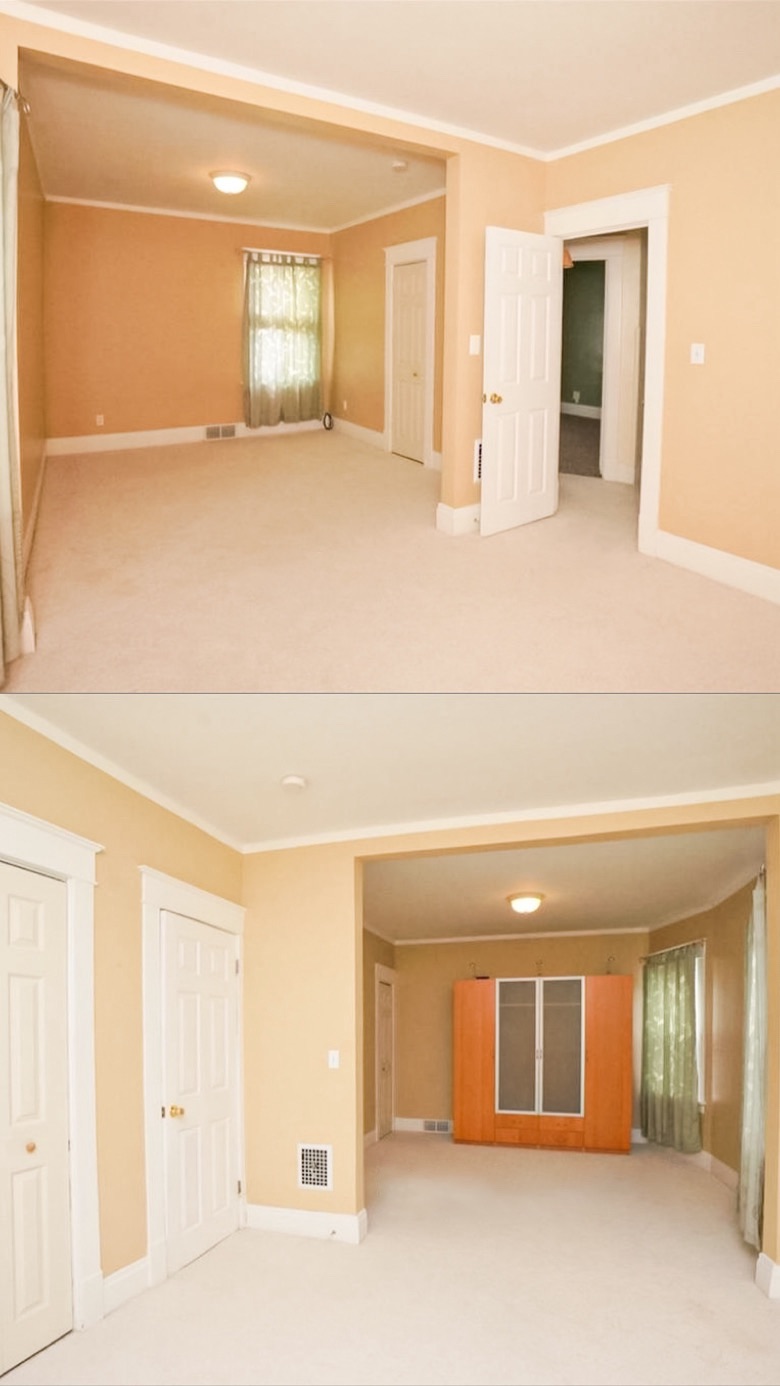
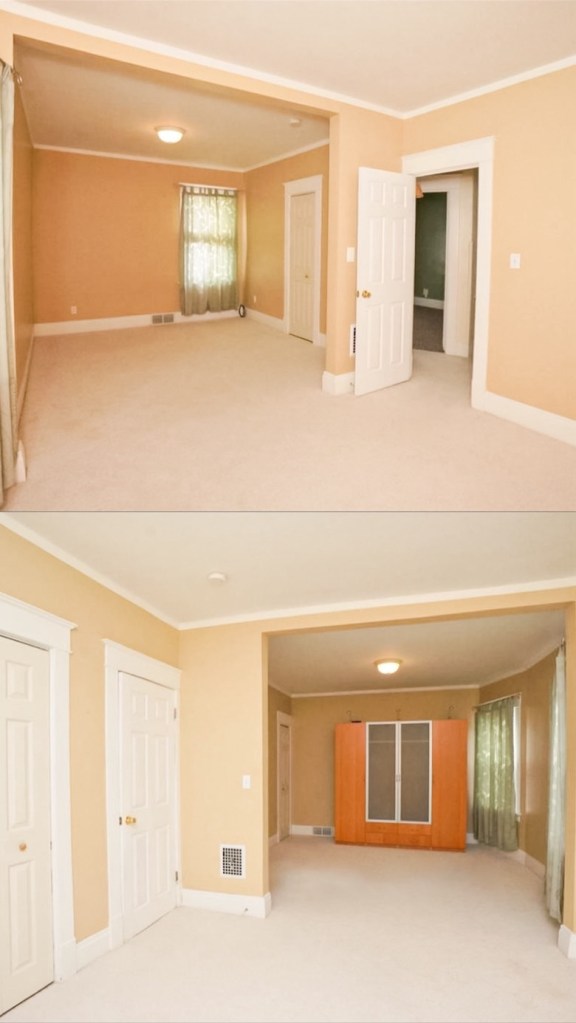
How it started:
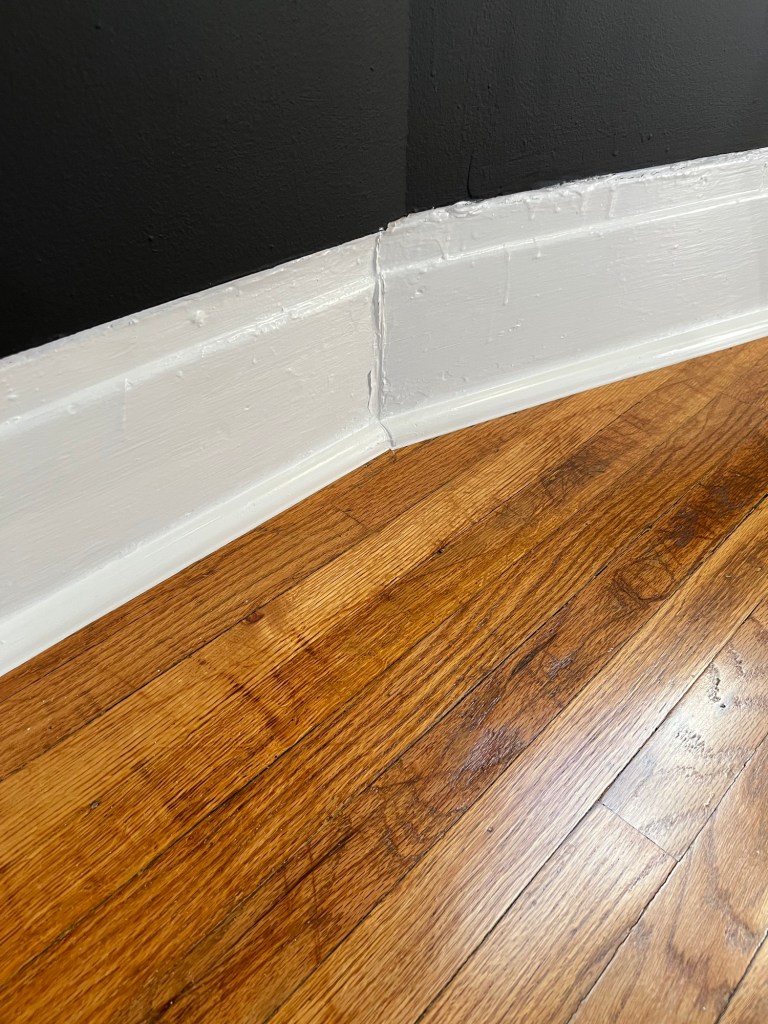
I knew there were hard wood floors, original to the home, under the carpet, so as soon as I got the keys to the house, the first thing I did was rip up it all up throughout my whole house.
Then I got to sanding and boy was this a task. Ripping up the carpets revealed quite a bit of water damage, which I had to assume occurred when an electrical fire broke out under the previous owner…
Fun fact: I did not find out about the fire until after I purchased my home and was finally able to get a look at the attic. The attic has what I like to call “fire scars” all over the place. I was not able to see this during the inspection because the previous owners had the attic so packed with their stuff that you almost couldn’t get through it. Plus side, the roof was replaced with a new full tear-off and all the electrical had been updated. So yay for those items, but hard boo on the non-disclosure of the fire.
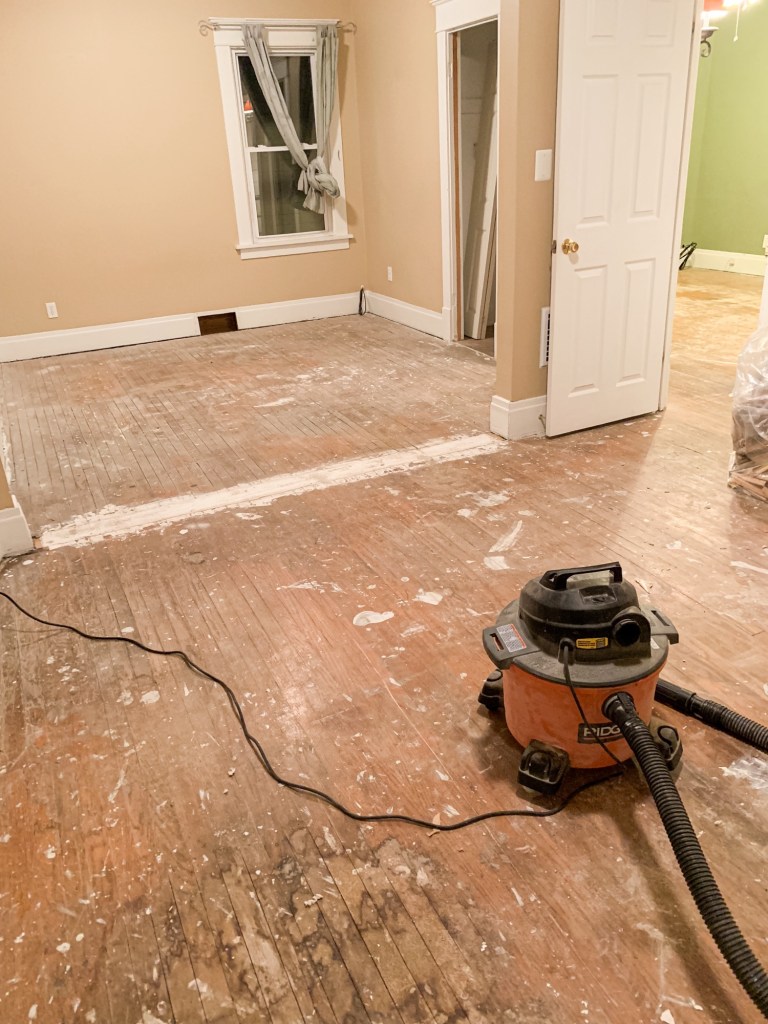
The water damage consisted of separating and warped boards as well as some large areas of water staining. So A LOT of sanding and a bucket or two of wood filler was the answer. While this did throw a kink in the complexity of this task, I loved learning how to do the whole process. I will be sure to do a future post on how I sanded and sealed my floors for any future DIYers.
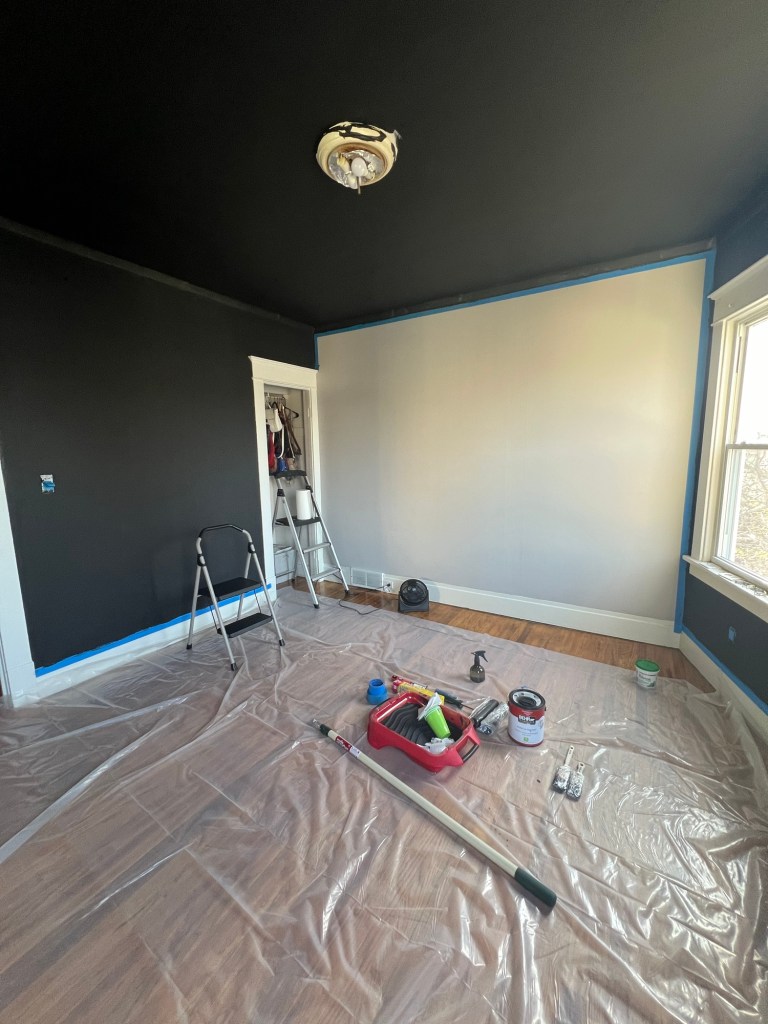
After the floors were sealed, I painted all the walls a cool gray tone called “Halation” in an eggshell finish by Behr Paint. This is my go-to color for a light cool gray.

This is essentially where the break happens. I moved my bedroom furniture in and have been deciding what I truly wanted to do with the space ever since.
Some years later, I found some good motivation to take on the task of finishing, at least a big part of, my bedroom. My bedroom is essentially two bedrooms with the wall opened between them to create a larger “master.” This is still city living though, so there’s definitely no grandeur.
With that being said, I had to move everything out of the way into the other side of the room, which I use as my “closet.” My mistake was not thinking ahead to realize I no longer had access to any of my clothes. So I lived out of the laundry basket I had available for the following few weeks. Good thing laundry is one of my favorite things to procrastinate.
Once everything was moved, the following were the tasks undertaken to bring this makeover to completion:
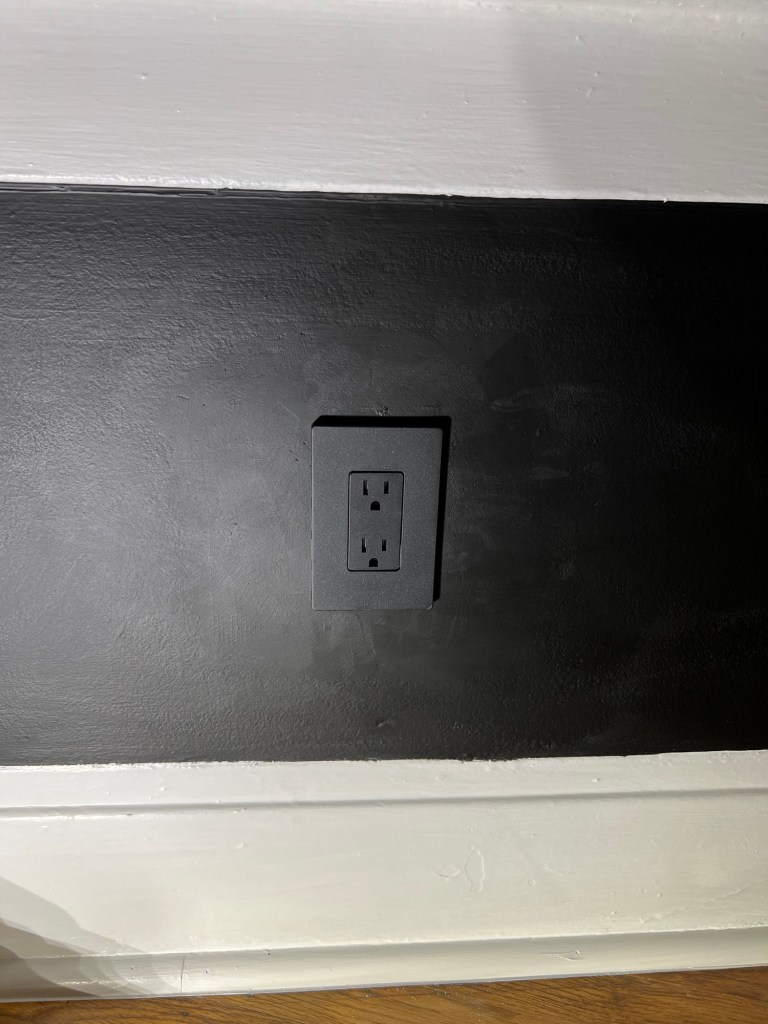
- Removed all electric outlet receptacles to swap from white to matte black. Could not be happier with the ones I found as they perfectly match my new wall color. Found on Amazon
- Removed the old ceiling light and sanded down the remnants.
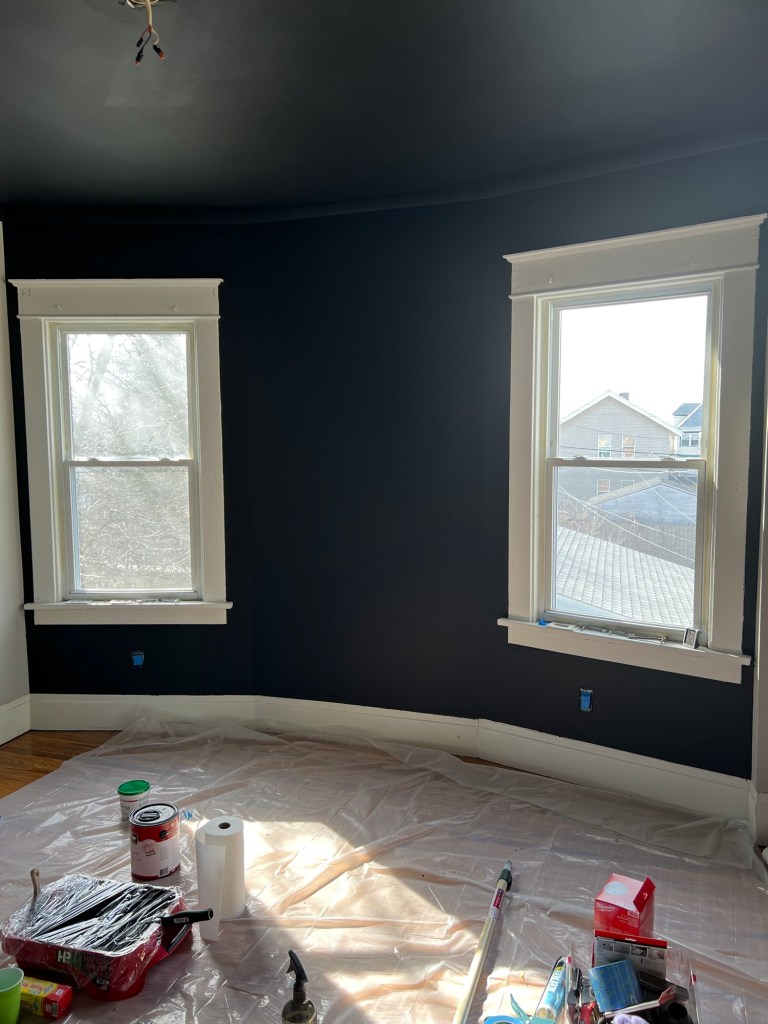
- Painted two walls and the ceiling black with two coats of Behr Paint’s “Limousine Leather” in a flat finish.
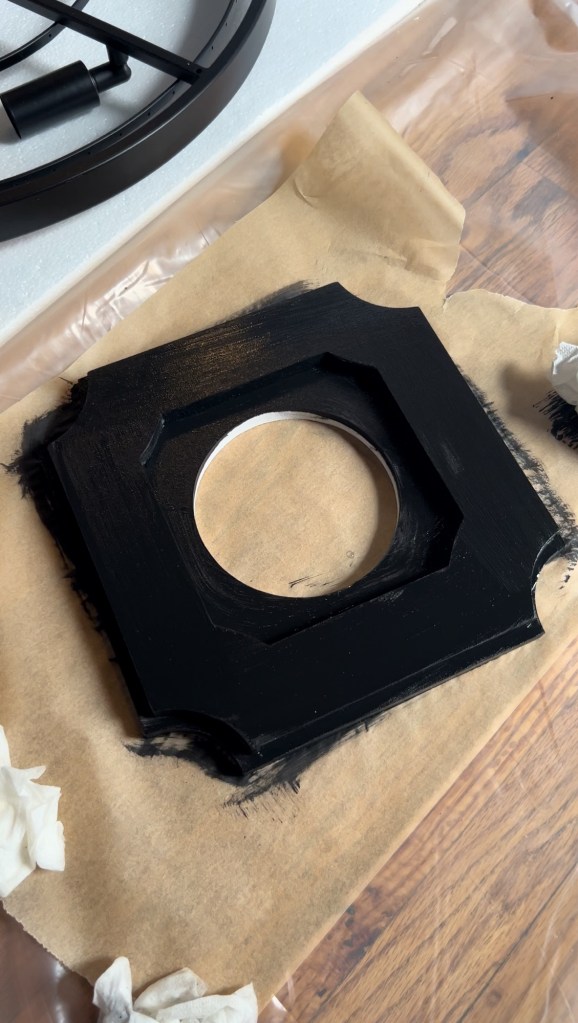
- Sanded and painted a new ceiling medallion in same paint as the ceiling. I had to sand the inner cut out to create a larger gap for the light fixture prior to painting, as the one I ordered was a bit too small. I found it on Amazon
- Installed the medallion and a new chandelier. I wanted this chandelier to be as close to the ceiling as possible, and by doing this it seemed easier to install them together, at the same time. I wanted a snug fit of the medallion’s central opening around the chandelier mount, so I figured by installing them as basically one piece it would be easier and avoid any alignment issues. Mistakes were made and looking back now I think I will install any future medallions first and deal with increasing screw lengths if necessary. I caulked around the medallion then painted it to create a more seamless look. Found the chandelier on Amazon
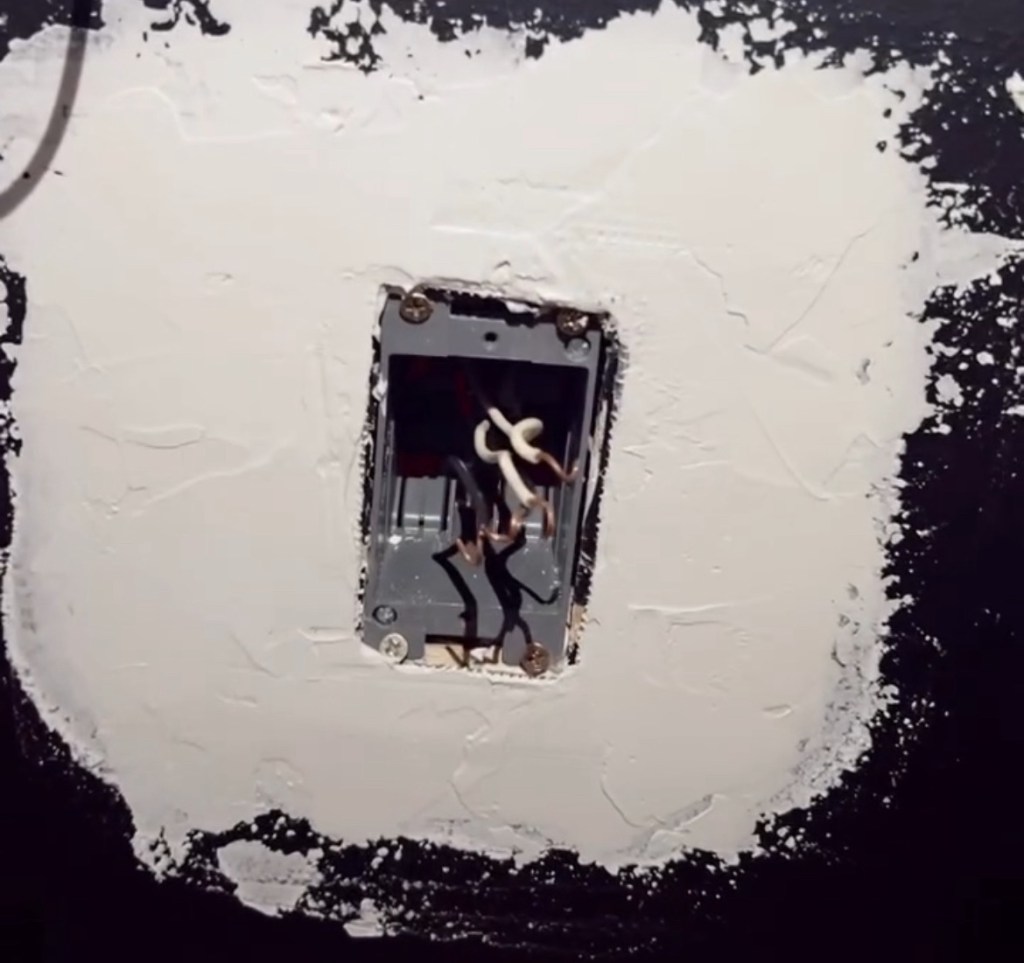
- Patched a broken wall surrounding an outlet box, which was most likely damaged by the previous owner while installing the outlet, using a Wal-Board Self Adhesive Drywall Repair Patch and Sheetrock All Purpose Ready-Mixed Joint Compound. Once the compound was dry, I gave it a sanding with a 220 grit sandpaper to smooth out any rough edges and create a seamless repair. I also replaced the entire outlet box since the existing one was broken and not installed securely. Confirmed I have no insulation in any of my exterior walls. Yay old houses! All materials for this were purchased from Home Depot
- Removed the old caulk from the windows and then re-sealed both the frame and trim. I used DAP ALEX FLEX White Premium Molding and Trim Sealant, which I also got at Home Depot
- Installed 3/4 inch Composite PVC Quarter Round to the baseboards using QEP Multi-Use Trim Shears for Angle Cuts and an 18 gauge nail gun, that I “stole” from my brother, with 1.75 inch Brad Nails. I then caulked to seal and fill any nail gaps. I used the same DAP caulking as for the window sealing.
- Painted all window frames, baseboards, and trim with two coats of Behr Paint’s White Semi-Gloss Enamel Interior/Exterior Cabinet, Door & Trim Paint, no color addition.
- Touched up paint in any areas that needed it.
- Installed new curtain rods I found at the At Home store.


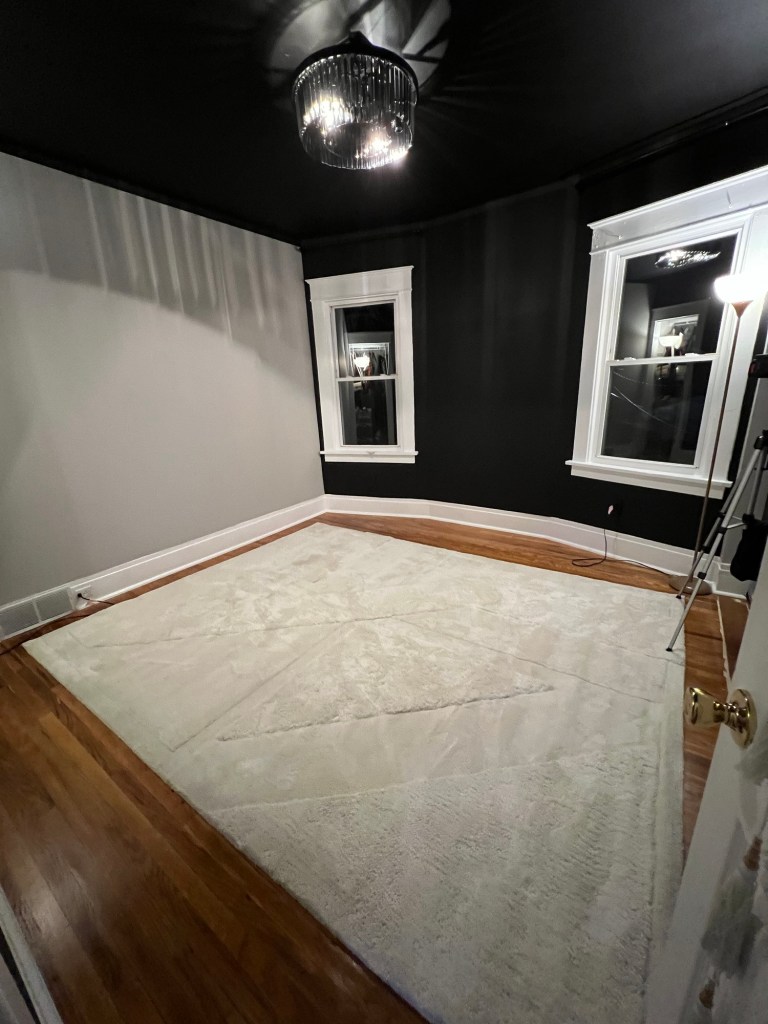
Once this was all done, I was finally able to give the floors a good scrub and start putting my room back together… and get to my clothes. I rolled out a new white plush rug I had purchased from the At Home store, then proceeded to arrange my furniture and bedding to how I wanted. I added the curtains and hung a few new prints.
I have since installed a new Frame TV and added some additional lighting features. I am not a big fan of a TV in the bedroom so having one that will look like a picture majority of the time is a win. The lights are rechargeable LED, so they did not need to be hard wired, which makes install and determining location a breeze.
I have one more small project I am considering to add to the space but that will be for another day… and now I have to finish the closet side of the room. I guess that will have to be in a part 2 release.
Thanks for following along!
Want to see what else I have going on, follow @mybflohome on instagram or the MY BFLO HOME facebook page.

Leave a comment